How to Propagate Olive Tree Heel Cuttings (Step-by-Step)
- Herman Kraut
- Feb 23
- 6 min read
Pruning season is when most gardeners think about shaping trees.
I think about multiplying them.
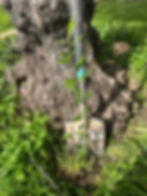
This year, while pruning our seven olive trees here in Central Portugal, I pulled a small heel cutting from the base of one trunk. The piece of bark and older wood was about 5 cm (2 inches) long. It even came up with a bit of soil attached and exposed an earthworm in the process. A good sign. Living soil means living roots.
I potted that cutting into a tall pot and placed it inside our greenhouse. No fancy mist system. No lab setup. Just patience and good timing.
If you have an olive tree you love, olive heel cutting propagation lets you clone it. Same genetics. Same fruit quality. Same resilience.
Let’s break it down step-by-step.
What Is a Heel Cutting (And Why Olives Respond Well)
A heel cutting is taken by pulling a side shoot away from the main branch so that a small strip of older wood remains attached at the base. That small “heel” contains mature tissue and stored carbohydrates.

Why this matters:
Older wood = stored energy
Stronger base = less collapse at soil level
More cambium contact = higher rooting potential
Olives are tough trees. Botanically, we are working with Olea europaea. They evolved in dry, rocky soils. They are not delicate greenhouse princesses. But they do respond well to semi-hardwood and heel cuttings when timing and humidity are right.
Heel cuttings often root better than soft tip cuttings because the base is more stable and less prone to rot.
Olive Heel Cutting Propagation: When to Take Cuttings for Best Success
Timing makes or breaks your success rate.
Best windows:
Semi-hardwood stage: Late summer to early autumn
Hardwood stage: Late winter during dormancy
Semi-hardwood means the shoot is no longer soft and floppy, but not fully woody either. You can bend it slightly, but it resists.
Cultivar matters. Some olives root easily. Others prefer grafting. That is normal. Even commercial growers adjust their method depending on the variety.
If you are in a Mediterranean Zone climate like ours:
Late August to October is excellent
Late winter hardwood cuttings are your second option
Avoid extreme heat or deep winter cold.
Tough Tip: If the tree is actively growing but not pushing soft, neon-green tips, you are likely in the sweet spot.
Tools and Materials (Keep It Simple)
You do not need a lab.
Most commercial propagation guides and nursery manuals recommend sterile propagation mixes, controlled mist systems, and precise rooting hormone concentrations. This season, I did the opposite. I used a spade, lifted a basal heel cutting with native soil attached, and potted it into sifted dirt from our land. It may not be nursery-perfect, but it mirrors how olives survive in the wild — with living soil and strong roots from day one.
That said, here are the recommended tools and materials used by professional nurseries and commercial olive growers to maximize rooting success:
Sharp, clean secateurs or knife
Clean pots with drainage holes
Free-draining propagation medium (perlite, coarse sand, or a 50:50 mix)
Labels and date marker
Rooting hormone containing IBA (often around 2,000–3,000 ppm for olives)
These recommendations come from commercial olive propagation practices, agricultural extension services, and nursery production systems where high success rates matter.
On a homestead scale, you can adapt.
If your native soil is sandy and well-draining, sifted soil can work well. If your soil is heavy clay, you must lighten it with coarse sand or perlite to avoid rot.

Step-by-Step: How to Take an Olive Heel Cutting
1. Choose the Right Shoot
Select a healthy side shoot:
No pests
No disease
About pencil thickness
2. Create the Heel
Pull the side shoot downward so it tears slightly from the parent branch. You want a small strip of older wood attached.
If the tear is messy, trim it clean with a knife. Keep the heel intact.

3. Trim the Cutting
Length: 10–15 cm (4–6 inches)
Remove lower leaves
Keep 2–4 leaves at the top
Leaf retention is important. Leaves help drive energy into root formation. But too many leaves increase water loss.
4. Lightly Wound (Optional)
Some growers lightly scrape one side of the heel to expose cambium. This can stimulate root formation.
Do not overdo it.
5. Dip in Rooting Hormone (Optional)
Quick dip into hormone powder or solution. Tap off excess.
6. Insert Into Medium
Insert 3–5 cm (1–2 inches) deep into your free-draining medium. Firm gently.
Label with date and cultivar.
The Rooting Environment (Where Most People Fail)
This is where olive heel cutting propagation either succeeds or rots.
Olives need:
Bright shade
Warm temperatures
High humidity
Moist, not wet, medium
Options:
Low-tech method
Clear plastic storage box with ventilation holes. Open daily for air exchange.
Greenhouse method
Place inside a greenhouse in indirect light. This is what I am doing with my recent heel cutting.
Mist system (higher success)
Professional growers use intermittent mist. Most home gardeners do not need this.
Water rule:
If the medium feels soggy, you are killing it. If it dries out fully, you are stressing it. Aim for evenly moist.
Tough Tip: Bottom heat around 20–24°C (68–75°F) speeds rooting, but in Mediterranean autumns, soil warmth often does the job naturally.
Aftercare and Potting Up
Rooting takes time. Hardwood cuttings: 8–12 weeks. Semi-hardwood: 4–10 weeks
Do not yank the cutting to check roots. Instead:
Look for new leaf growth
Gently tug. If it resists, roots are forming
Once rooted:
Pot up into slightly richer soil
Increase sun exposure gradually
Avoid full midday sun at first
Hardening off matters. A greenhouse-raised cutting cannot jump straight into harsh summer sun.

Bonus: Other “Free Olive Tree” Options
Heel cuttings are powerful. But they are not your only tool.
Basal suckers with roots attached
Air layering for thicker branches
Grafting onto hardy rootstock
If you already have suckers forming at the base, sometimes nature has done half the work for you.
Plant for Decades, Not Days
Olive trees think in centuries. Your job is simple:
Take more cuttings than you need
Create the right environment
Be patient
That small 5 cm heel cutting I took during pruning may become another tree shading our land decades from now.
Propagation is resilience. One tree becomes ten. Ten become a grove. If you try olive heel cutting propagation, tell me:
What’s your climate?
What’s your success rate?
Let’s compare notes and grow stronger roots together.
Herman’s Tough Kraut Fixes: Common Challenges Propagating Olive Tree Heel Cuttings
Troubleshooting olive heel cutting propagation is where most growers learn the real lessons. This mini FAQ addresses the most common problems so you can adjust early instead of starting over.
Q: The base turned black and mushy. What happened?
A: Rot. Your medium was too wet or airflow too low. Use more perlite or coarse sand. Increase ventilation.
Q: Leaves shriveled within days.
A: Humidity too low. Use a humidity dome or enclosed box. Reduce leaf surface by trimming larger leaves in half.
Q: Callus forms but no roots appear.
A: Normal stage. Be patient. Slight bottom warmth can help push root development.
Q: White mold on the soil surface.
A: Too much moisture and stagnant air. Open your propagation box daily. Let the top layer dry slightly between watering.
Q: Roots formed, but growth stalled after potting up.
A: Likely transplant shock or too much sun too soon. Reduce light intensity for 1–2 weeks and water consistently but lightly.
Remember: Take 5–10 cuttings, not one. Even professionals expect some failure. Cloning trees is a numbers game.
Recommended Books & Resources
Books
Organic Olive Production Manual by Paul Vossen
A grower-style olive handbook that helps you understand varieties, orchard care, and the “why” behind olive management choices.
RHS Propagating Plants by Alan Toogood
Step-by-step propagation methods with clear photos, great for dialing in cuttings, humidity, and timing without the fluff.
The Reference Manual of Woody Plant Propagation by Dirr & Heuser
The no-nonsense woody cutting bible for when you want the details on hormone use, wounding, and species-specific quirks.
Hartmann & Kester’s Plant Propagation: Principles and Practices
A deeper, more technical guide that explains what is happening inside the cutting, so your “trial and error” becomes “trial and data.”
Resources
Rooting hormone powder with IBA (for woody cuttings)
The simplest way to boost rooting odds and speed, especially when your cuttings do not already have fine roots attached.
Heat mat + thermostat combo (for steady rooting temps)
Keeps the root zone warm and stable, which often matters more than “more water” in the early weeks.
Self-watering propagator (capillary system)
It waters from below so cuttings stay evenly moist without sitting in soggy mix, which is a quiet game-changer for rot prevention.
Tough Kraut Resources
Want the exact books and propagation gear we trust for olive heel cuttings, plus a few budget swaps? Click Tough Kraut Resources and steal our shortlist.